From the archive Nov 2013
Alpha Mapping in SceneJS
An original article from the xeolabs archive. Examples and external tools reflect the time of writing.
Alpha mapping is a technique where an image is mapped to a 3D object to designate certain areas of the object to be transparent or translucent.
In this tutorial, I'll build on techniques from the Transparency tutorial to show you how to
- apply a texture to an object make holes in it
- apply a video texture to make animated areas of transparency
#Basic alpha map
As usual, we'll point SceneJS at where you keep your plugins:
SceneJS.setConfigs({
     pluginPath:"./plugins"
});
Then we'll create the scene below, in which the outer green box has an alpha texture which creates transparent areas through which you can see the inner blue box.
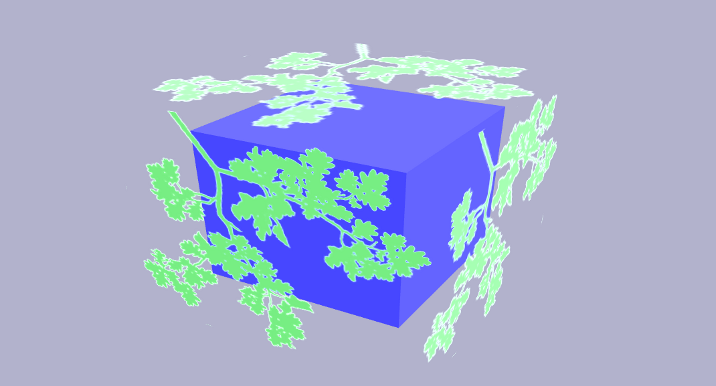
Shown below is the texture we'll use for the alpha map. The white areas will be where the outer box will be opaque, while the black areas are where it will be transparent.

Listed below is the code that defines our scene. It's using flags and material nodes to set up
transparency (which you learned about in the Transparency tutorial), plus a texture node, which
varies the transparency across the surface of the outer green box.
var scene = SceneJS.createScene({
    nodes:[

        // Orbiting camera node, implemented by plugin at
        // https://xeolabs.github.io/scenejs/api/latest/plugins/node/cameras/orbit.js
        {
            type:"cameras/orbit",
            yaw:30,
            pitch:-30,
            zoom:5,
            zoomSensitivity:1.0,

            nodes:[

                // Outer green box with alpha map

                // Flags node enables transparency for the box.
                // This enables the material `alpha` to specify
                // the degree of opacity.
                {
                    type:"flags",
                    flags:{
                        transparent:true
                    },
                    nodes:[

                        // Material node's 'alpha' property makes
                        // the pixels of the box opaque by default.

                        {
                            type:"material",
                            color:{
                                r:0.5, g:1, b:0.5
                            },
                            alpha:1.0,
                            nodes:[

                                // The alpha map is a texture that's
                                // applied to the alpha channel of the
                                // material, to vary it according to
                                // the intensity of each texture pixel.
                                {
                                    type:"texture",
                                    src:"../../../textures/leavesAlphaMap.jpg",
                                    applyTo:"alpha",
                                    blendMode: "mul",  // Default

                                    nodes:[
                                        {
                                            type:"geometry/box"
                                        }
                                    ]
                                }
                            ]
                        }
                    ]
                },

                // Inner blue box

                {
                    type:"material",
                    color:{
                        r:0.3, g:0.3, b:1
                    },
                    nodes:[
                        {
                            type:"scale", x:0.7, y:0.7, z:0.7,
                            nodes:[
                                {
                                    type:"geometry/box"
                                }
                            ]
                        }
                    ]
                }
            ]
        }
    ]
});
Things to note:
- The
transparentflag on thatflagsnode enables transparent rendering of the outer green box. - The
materialnode around the outer green box has analphaproperty, which is set to1.0. - An
alphavalue of 0.0 is completely transparent, while 1.0 is completely opaque. - The
texturenode applies a texture to the outer box. - The
texturenode'sapplyToproperty causes the image to be applied to thematerialnode'salphaproperty, effectively modulating the alpha across the box's surface.
Texture blend mode
The blendMode on our texture has the value multiply, which causes it to multiply the colour of each image pixel
with the material alpha value, causing the material alpha to be 0.0 where the pixels are black, and 1.0 where the pixels are white.
The other supported value for that property is add, which adds the value of each image pixel to the alpha. To
achieve the same effect as shown in this example, you would then need an alpha of 0.0 on the material.
#Video alpha map
Now I'll show you how to apply a video as an alpha map. This time, we'll dynamically sample our texture from an .OGV file, to create a cool flowing gas pattern across the surface of the outer box.
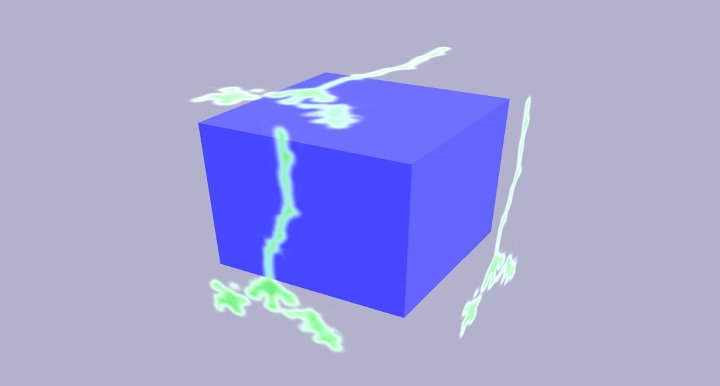
The code is identical to the previous example, except for the texture node, which looks like this:
{
    type:"texture/video",
    src:"../../../movies/testVideo.ogv"
    applyTo:"alpha",
    //...
}
Things to note:
- We're using a
texture/videonode, which streams the video file into the texture - Each of the video's frames is a grayscale image, applied using the same principles as used for regular image textures
Conclusion
In this tutorial I showed you how to use the texture node, in conjunction with transparency techniques I described
in the Transparency tutorial, to make holes in things. I also showed you how it's easy
to use a video, instead of the usual image, in order to make animated regions of transparancy.
